HTML 101, for programmers
Most HTML guides teach beginners. This one teaches experienced programmers unfamiliar with HTML.
This article is part of my web development series 'webDEV101'. You can read the whole series here:
HTML?
HTML, or HyperText Markup Language, is THE language of the internet.
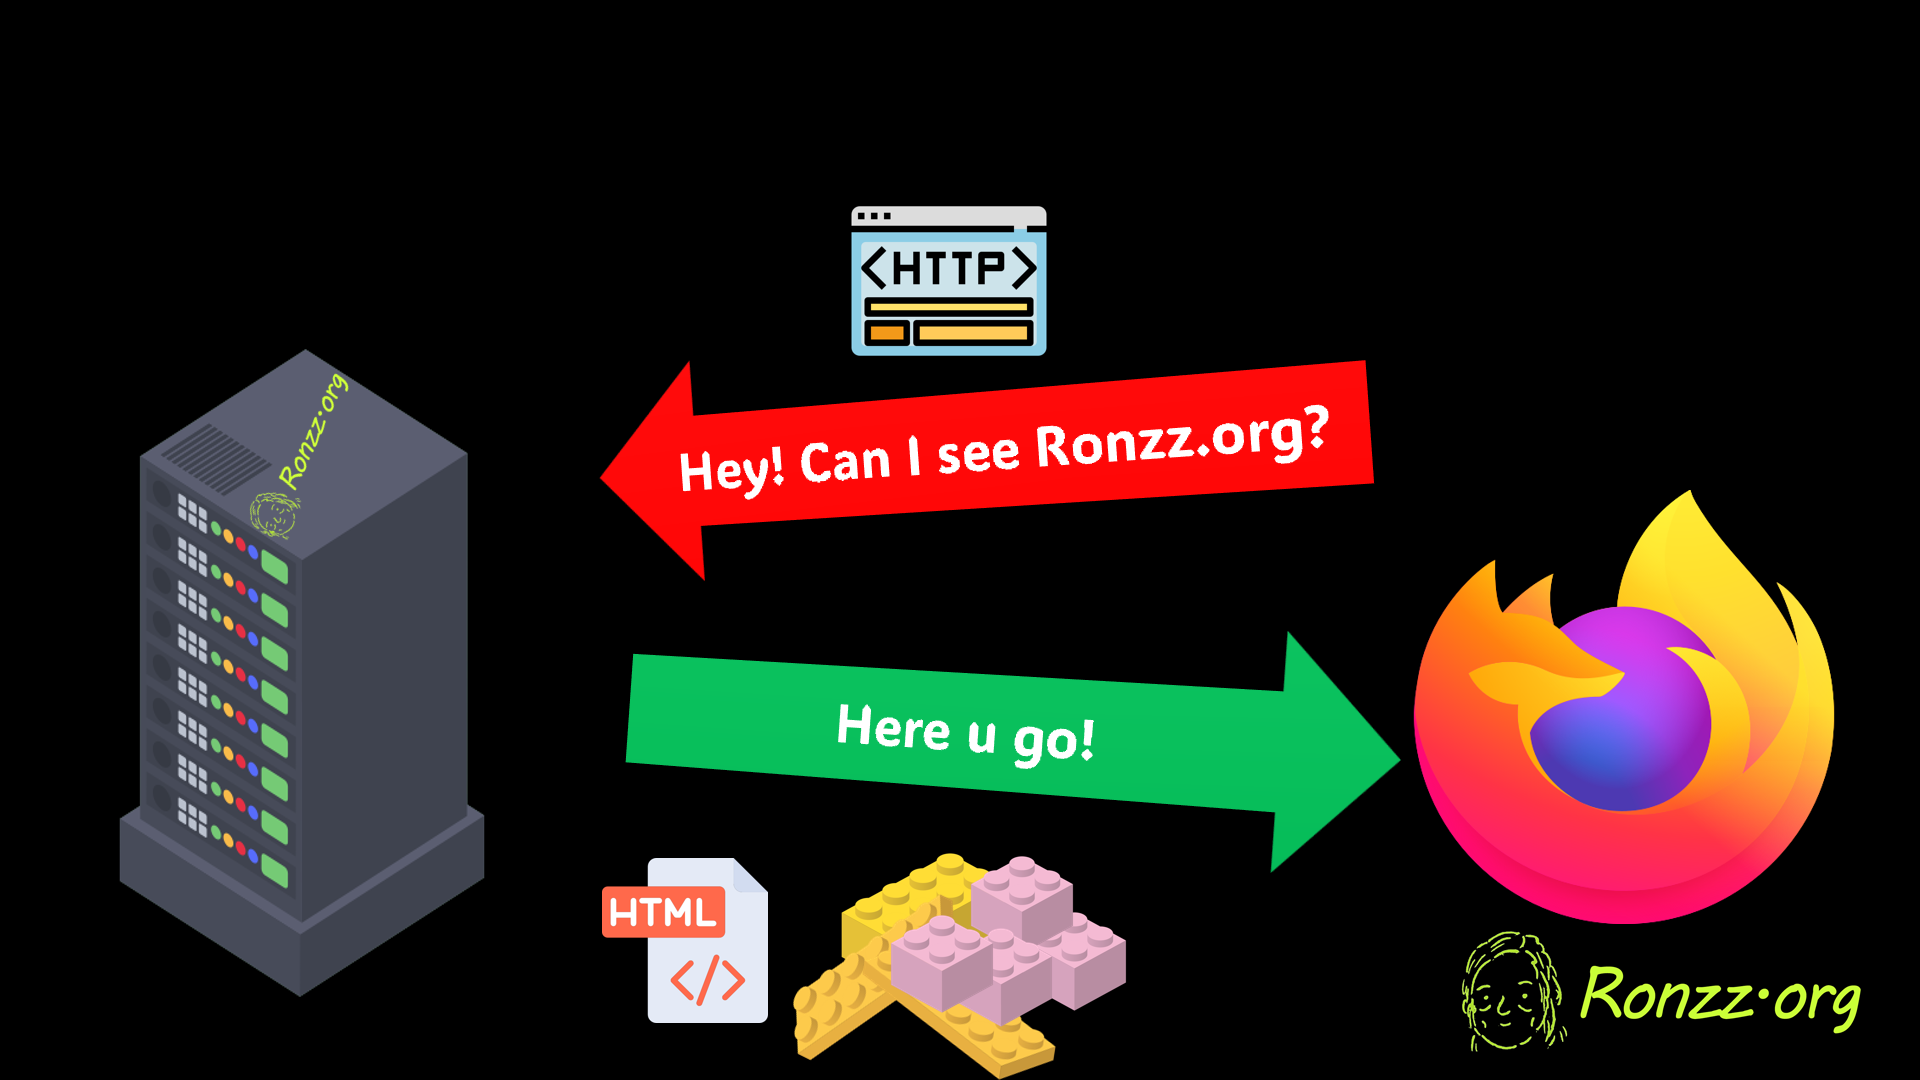
When you access a website, Ronzz.org, for instance, the website server sends many assets to your web browser: styling information (CSS), animation (Javascript), images (.png, .jpeg, etc.), and even audios (.mp3, .wav) and videos (.mp4). All those assets correctly assembled form the stunning content you see across the internet.
A good analogy is the server sends your web browser a LEGO set.
Have you ever tried to assemble a LEGO set without the manual? Were you successful?
Assembling a LEGO set without the manual is no easy feat for smart humans: For computers it is mission impossible.
That's why HTML is important: HTML is that manual containing all the necessary instructions for your browser to assemble the virtual LEGO pieces correctly.
HTML= A bunch of <tags>
HTML, similar to a LEGO manual, must specify where every building block of the webpage (text, images, links, etc.) should be placed. It does so via pairs of tags (<tag></tag>s) and occasionally single 'stray' <tag>s.
<tag></tag>s and <tag>s can do everything. A simple <tag></tag> pair specify a paragraph of text, an image, a link etc., while a container <tag></tag> nests around multiple simple <tag></tag>s to keep the HTML organised. To keep long HTML files organised, HTML supports multi-level nesting, that is, nesting container <tag></tag>s within container <tag></tag>s.
The snippet below is abstract but quintessential HTML: a multi-level nesting of <tag>s:
<tag1>
    <tag1.1>
        <tag1.1.1></tag1.1.1>
        <tag1.1.2></tag1.1.2>
    </tag1.1>
</tag1>
Now enough with abstract art. Let's get down to concrete business.
HTML structure
Classic HTML structure:
<!DOCTYPE html>
<html lang="en">
<head>

</head>
<body>
    <!-- Your content here -->
</body>
</html>
Line 1 and 2, each containing a 'stray' <tag>, inform the browser that this HTML is in version 5 (<!DOCTYPE html>) and English (lang = "en"). The remaining lines specify two generic containers, which we will discuss next.
<head>
Basic head setup:
<!DOCTYPE html>
<html lang="en">
<head>
    <meta charset="UTF-8">
    <meta name="viewport" content="width=device-width, initial-scale=1.0">
    <meta name="author" content="Your Name">
    <meta name="date" content="2025-02-13" scheme="YYYY-MM-DD">
    <meta name="description" content="This is a sample HTML page with essential tags.">
    <title>Sample HTML Page</title>
</head>
<head> is comparable to the 'About' section on a LEGO manual. It contains metadata, which is not displayed but used by browsers, search engines, and other web services to understand and process the webpage content. Lines 4-5 give your browser technical instructions to encode, scale, and display the content, and can be copy-pasted into most HTML files to good results. Lines 6-8 specify author, date, and webpage description, which are essential for search engine indexing.
Note the syntax to specify metadata in HTML 5 :
<meta name="(Property_name)" content="Property value">
In addition to providing metadata, in line 9 the <head> depicts the webpage title. The title is usually displayed in the browser navigation bar.
Body
<body> specifies where each individual LEGO piece (text, audio, graphics, interactives, etc.) must be placed to correctly assemble the webpage.
Display Text
Nested within<h(N)></h(N)> are Nth level headings:
<h1>This is a level 1 heading</h1>
<h2>This is a level 2 heading</h2>
<h3>This is a level 3 heading</h3>
<h4>This is a level 4 heading</h4>
<h5>This is a level 5 heading</h5>
<h6>This is a level 6 heading</h6>
Nested within <p> </p> are paragraphs:
<p>I love Ronzz.org!</p>
Text nested within <strong></strong> or <em></em> are displayed in bold or italics:
<p>I <em>love</em> <strong>Ronzz.org!</strong></p>
->
I love Ronzz.org!
<br>s, called line breaks, break the line.
<p>Those who trust they are correct<br>are most prone to errors.</p>
->
Those who trust they are correct
are most prone to errors.
Hyperlinks
<p>Visit <a href="https://www.ronzz.org"> Ronzz.org</a> now!</p> ->
Visit Ronzz.org now!HTML recognises hyperlinks by <a></a>. The text between <a> and </a> is displayed, while the href="xyz.org" specifies the actual link, which could be relative or absolute. When in doubt, use absolute paths, that is, entire paths starting from xyz.org or server IP addresses, since relative paths will stop functioning once the .HTML file is moved.
Btw <a> stands for anchor, so it's called an anchor element. Nest anchors into <p></p>s and <h(N)></h(N)>s to display links inline.
Images
Display images with <img>. Specify the path to the image in src (source), and the alt text in alt.
If you want to add a caption to the <img>:
<figure>
    <img src="image.jpg" alt="Description of image">
    <figcaption>This is the caption for the image.</figcaption>
</figure>
The <figure> is a container to group the image with its caption <figcaption> .
Note most <tag>s we have encountered, except <img> and <meta>, are closed by </tag>s, signifying their completion. The proper terminology for <tag>s without matching </tag>s, which we have been calling 'stray' tags, is void elements.
Videos
A video can be embbed in HTML similar to how an image is embedded :
<video controls src="${src}" title="${title}"></video>
Lists
<h4>Unordered List</h4>
<ul>
    <li>First item</li>
    <li>Second item</li>
    <li>Third item</li>
</ul>

<h4>Ordered List</h4>
<ol>
    <li>First item</li>
    <li>Second item</li>
    <li>Third item</li>
</ol>

<h4>Description List</h4>
<dl>
    <dt>HTML</dt>
    <dd>HyperText Markup Language</dd>
    <dt>CSS</dt>
    <dd>Cascading Style Sheets</dd>
    <dt>JavaScript</dt>
    <dd>A programming language for the web</dd>
</dl>

<h4>Multi-level List</h4>
<ol>
    <li>First item</li>
    <li>Second item</li>
    <li>Third item
        <ol><li>3.1</li></ol>
    </li>
</ol>
is rendered as:
Unordered List
- First item
- Second item
- Third item
Ordered List
- First item
- Second item
- Third item
Description List
- HTML
- HyperText Markup Language
- CSS
- Cascading Style Sheets
- JavaScript
- A programming language for the web
Multi-level List
- First item
- Second item
- Third item
- 3.1
Note that some website CSS may interfere with the Description List.
(CSS = Cascading Style Sheets, which controls the website theme)
Commenting
Syntax
<!-- Your comment goes here -->
Attributes
<a href="https://www.ronzz.org">Visit Ronzz.org</a>
<img src="image.jpg" alt="Description of image">
Note that in anchor links, the link is specified in href, while in images the path is specified in "src". Both href and src are attributes.
Additional attributes can modify the rendering behaviour:
<a href="https://www.ronzz.org" target="_blank">Visit Ronzz.org</a>For links:
target="_blank"open the link in a new tab instead of the current one.
Try:
Visit Ronzz.org
Organization
Recall the basic HTML structure:
<!DOCTYPE html>
<html lang="en">
<head>

</head>
<body>
    <!-- Your content here -->
</body>
</html>
The technical term for <head></head> and <body></body> pairs is structure tags, so called since they define the overall structure of the HTML.Some lower-level structural tags are also available inside<body></body>.
- <header></header> pair nest the webpage header, which may consist of a logo, a navigation bar, or a search box.
- <main></main>pair nest content unique to the page and not reproduced widely elsewhere, which may include text, images, embedded forms, etc.
- <section></section> divides long <main></main>s into more comprehensible bits.
- <footer></footer> pair nest general info reproduced across the entire website, such as author information, copyright, contact details, sitemap, and terms of use, etc.
An example/template/model:
<!DOCTYPE html>
<html lang="en">
<head>
<meta charset="UTF-8">
<meta name="viewport" content="width=device-width, initial-scale=1.0">
<title>Example HTML Document</title>
</head>
<body>
<header>
<h1>Bienvenue!</h1>
</header>
<main>
<section>
<h2>Hey! Do you love this guide?</h2>
<p>Consider subscribing! There is a free tier!</p>
</section>
</main>
<footer>
<p>© 2025 Ronzz.org</p>
<img src="https://ronzz.org/content/images/2025/02/tp_Ronzz.org_logo.png">
</footer>
</body>
</html>
->
Bienvenue!
Hey! Do you love this guide?
Consider subscribing! There is a free tier!
Advanced: Forms
An HTML web form collects user input.
Download and open this example pet survey in any browser to see the rendered result:
which should look like this:
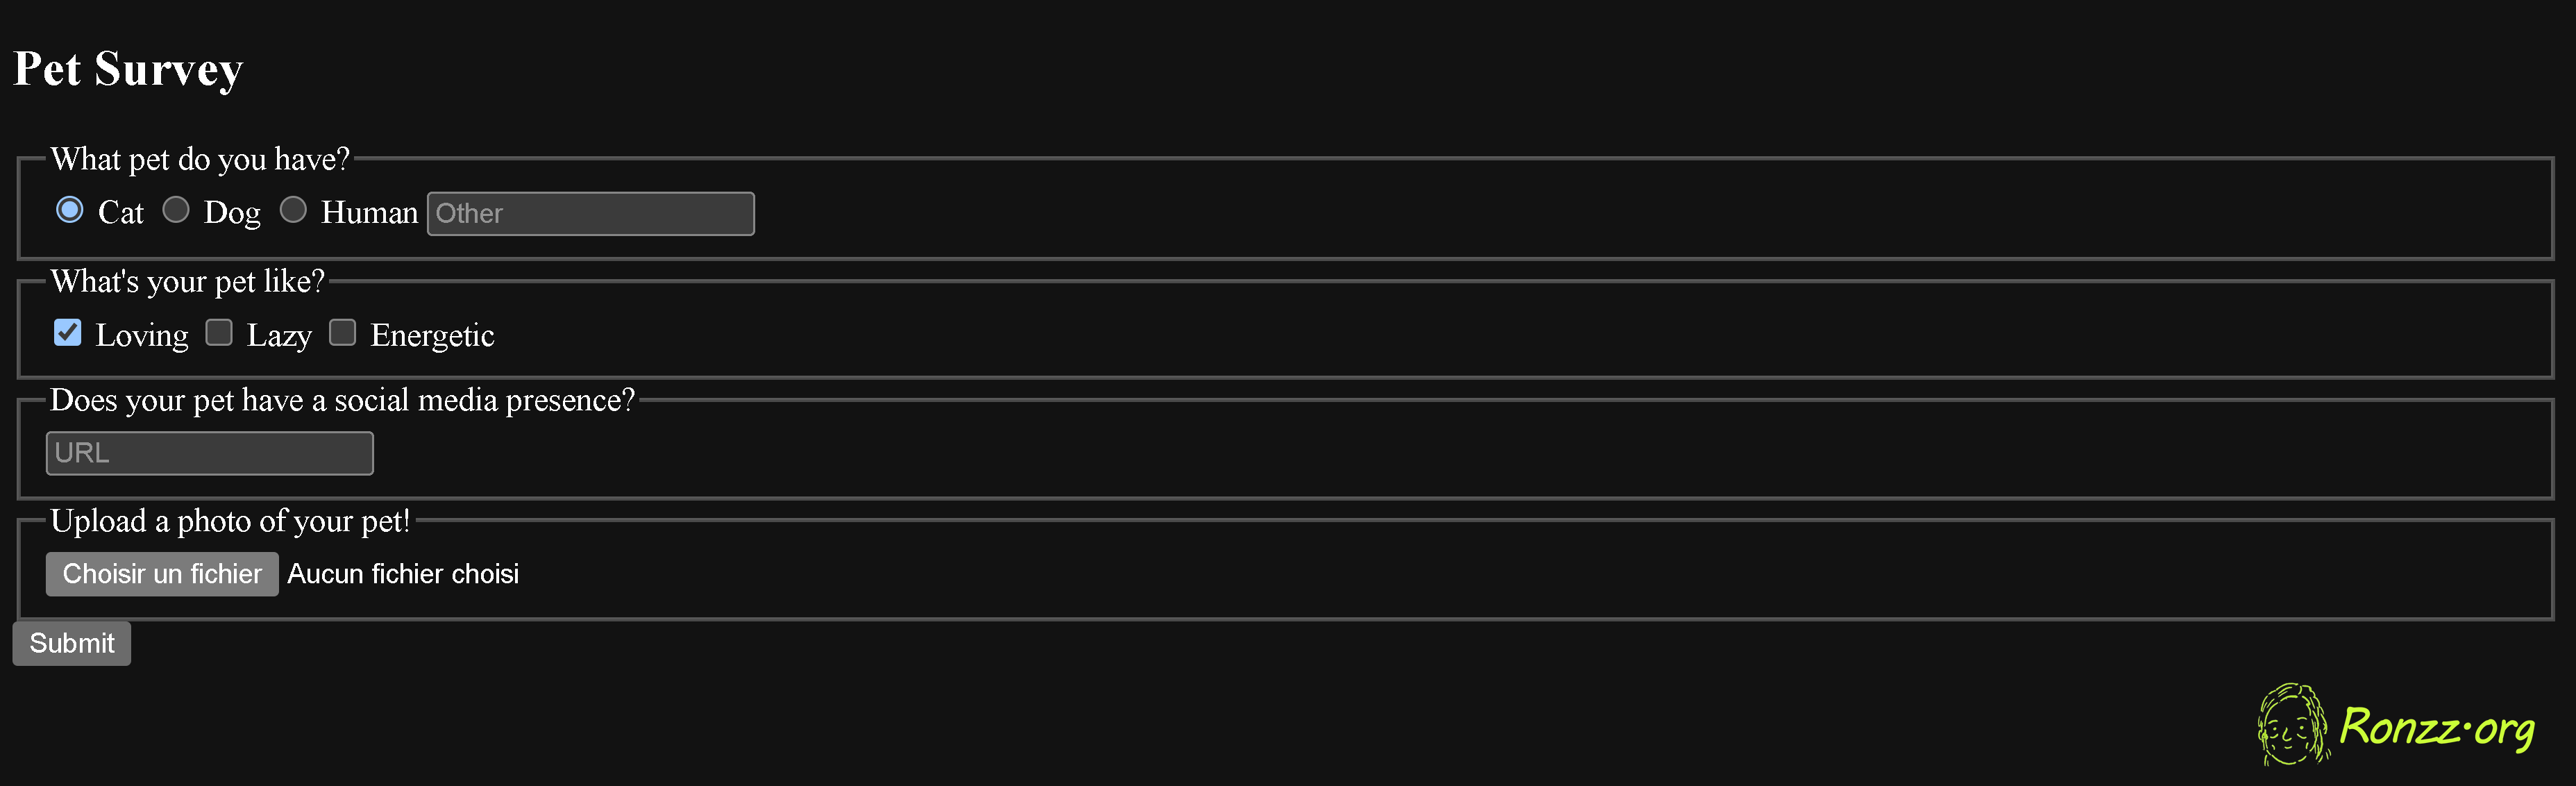
The HTML source code is displayed below for overview.
<!DOCTYPE html>
<html lang="en">
<head>
    <meta charset="UTF-8">
    <meta name="viewport" content="width=device-width, initial-scale=1.0">
    <title>Sample HTML Page</title>
    <meta name="author" content="Ron Chou">
    <meta name="date" content="2025-02-13" scheme="YYYY-MM-DD">
    <meta name="description" content="This is a sample HTML page with essential tags.">
    <title>Pet Survey @ Ronzz.org</title>
</head>
<body>
    <main>
<h2>Pet Survey</h2>
        <form action="https://www.xivilization.org/ronzz_pet_survey" method="post">
          <fieldset>
            <legend>What pet do you have?</legend>
            <input id="cat" type="radio" name="pet-type" value="cat" checked> <label for="cat">Cat</label>
            <input id="dog" type="radio" name="pet-type" value="dog"> <label for="dog">Dog</label>
            <input id="human" type="radio" name="pet-type" value="human"> <label for="human">Human</label>
            <input id="other" type="radio" name="pet-type" value="other"> <label for="other">Other</label>
            <input type="text" name="other-pet-type" placeholder="If other, please specify">
          </fieldset>
          <fieldset>
            <legend>What's your pet like?</legend>
            <input id="loving" type="checkbox" name="personality" value="loving" checked> <label for="loving">Loving</label>
            <input id="lazy" type="checkbox" name="personality" value="lazy"> <label for="lazy">Lazy</label>
            <input id="energetic" type="checkbox" name="personality" value="energetic"> <label for="energetic">Energetic</label>
            <input type="text" name="other-personality" placeholder="If other, please specify">
          </fieldset>
          <fieldset>
            <legend> Does your pet have a social media presence?</legend>
            <input type="text" name="socialURL" placeholder="URL">
          </fieldset>
        <fieldset>
            <legend>Upload a photo of your pet!</legend>
            <input type="file" name="pet-photo" accept="image/*">
        </fieldset>
          <button type="submit">Submit</button>
        </form>
    </main>
        <footer><p>Ronzz.org</p></footer>
</body>
</html>
This is a full HTML file complete with <head></head> and <footer></footer>. You should be familiar with HTML syntax at this point. Therefore, we will focus on <form></form>.
<Form>
<form action="url to receive the response" method="post">

</form>
Attribute 'action' specifies the destination URL that collects the form. Said URL must have a reception system (called a 'server-side endpoint') set up to handle the data.
One possible solution is via Flask:
Attribute 'method' specifies the format in which the data should be sent in. POST should be the default unless you have strong reasons to favour another method, for POST does not append the user responses to the destination URL during data transmission, hence protecting user privacy.
<fieldset>
<fieldset>
            <legend>What pet do you have?</legend>
            <label><input id="cat" type="radio" name="pet-type" value="cat" checked> Cat</label>
            <label><input id="dog" type="radio" name="pet-type" value="Dog"> Dog</label>
            <label><input id="human" type="radio" name="pet-type" value="human"> Human</label>
            <input type="text" name="pet-type" placeholder="Other">
          </fieldset>
A <fieldset></fieldset> pair should enclose each question.
A <legend> </legend> pair should enclose the question text.
<input>s, which are void elements without closing tags, accept user input.
Text questions
<fieldset>
    <legend> Does your pet have a social media presence?</legend>
    <input type="text" name="socialURL" placeholder="URL">
</fieldset>
Focus on line 3. The 'type' attributes specify that this is a text question and a string input is expected. Other possible types are:
button | checkbox | color | date | datetime-local | email | file | hidden | image | month | number | password | radio | range | reset | search | submit | tel | time | url | week|
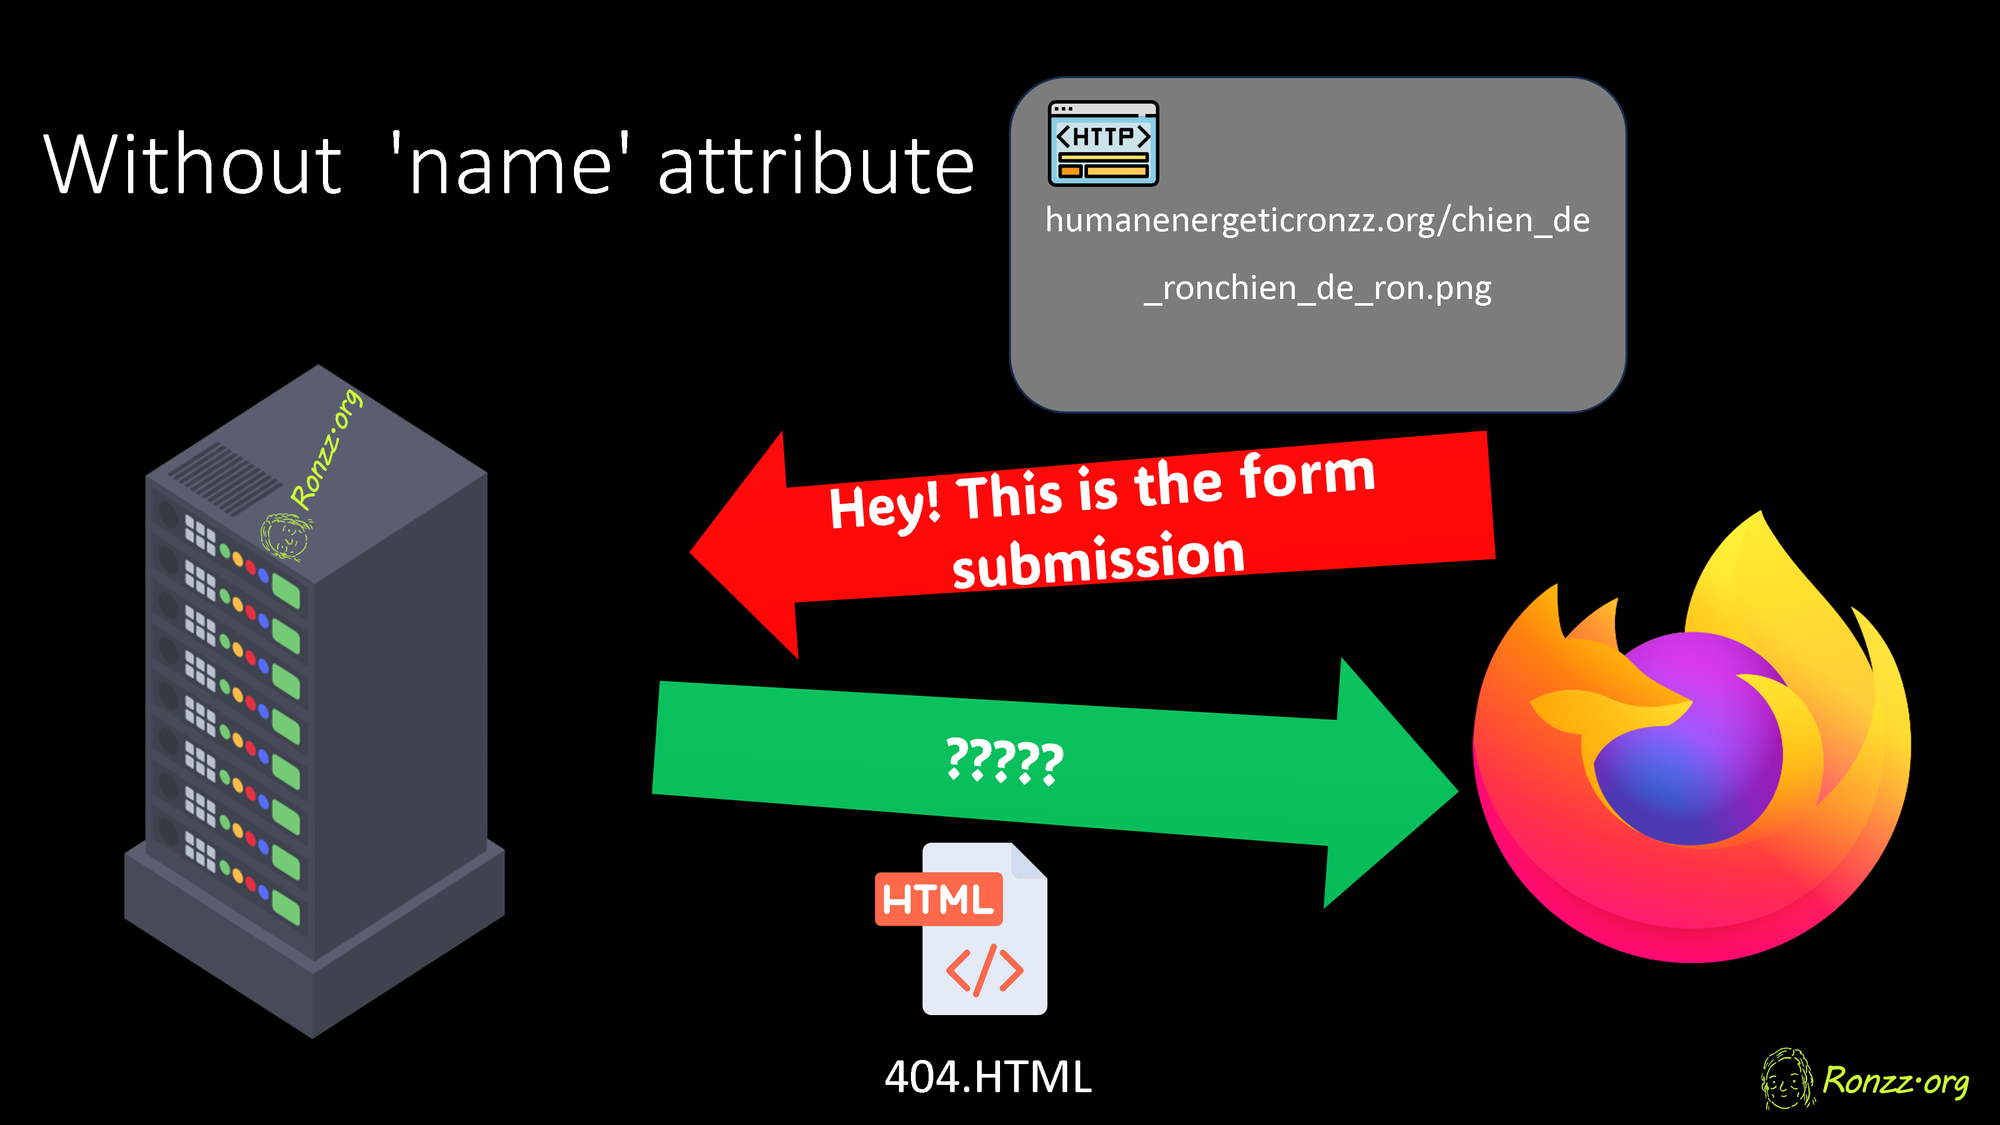
The 'name' attribute enables server-side form handling.

The 'placeholder' is displayed until the text field receives an input.

Radio questions
<fieldset>
    <legend>What pet do you have?</legend>
    <label><input id="cat" type="radio" name="pet-type" value="cat" checked> Cat</label>
    <label><input id="dog" type="radio" name="pet-type" value="dog"> Dog</label>
    <label><input id="human" type="radio" name="pet-type" value="human"> Human</label>
    <label><input id="other" type="radio" name="pet-type" value="other"> Other</label>
    <input type="text" name="other-pet-type" placeholder="If other, please specify">
</fieldset>
Use 'radio' for single-answer multiple choices. For each 'name', only one selection is accepted so selecting one automatically deselects the previous selection. Combine with 'text' to accept alternative answers.
For code readability, nest the <input> and its descriptive text in <label></label>.
Checkboxes
<fieldset>
    <legend>What's your pet like?</legend>
    <input id="loving" type="checkbox" name="personality" value="loving" checked> <label for="loving">Loving</label>
    <input id="lazy" type="checkbox" name="personality" value="lazy"> <label for="lazy">Lazy</label>
    <input id="energetic" type="checkbox" name="personality" value="energetic"> <label for="energetic">Energetic</label>
    <input type="text" name="other-pet-type" placeholder="If other, please specify">
</fieldset>
Use 'checkbox's for multiple choices with more than one answer. Again you may wish to combine with 'text' to accept alternative answers.
Notice in this example only the descriptive text is nested in <label></label>, and all the <label>s have a 'for' attribute referring to the relevant checkbox element. This is syntactically equivalent to nesting both the <input> and its descriptive text in <label></label>.
Using the 'for' attribute is preferred to accomodate older assistive technology and enable more layout options.
File uploads
<fieldset>
    <legend>Upload a photo of your pet!</legend>
    <input type="file" name="pet-photo" accept="image/*">
</fieldset>
The 'accept' attribute specifies the file type. Some possible values are:
accept="image/*": Accepts all image types.accept="image/png": Accepts PNG images.accept="image/jpeg": Accepts JPEG images.accept="image/gif": Accepts GIF images.accept="video/*": Accepts all video types.accept="video/mp4": Accepts MP4 videos.accept="audio/*": Accepts all audio types.accept="audio/mp3": Accepts MP3 audio files.accept=".pdf": Accepts PDF files.accept=".doc,.docx": Accepts DOC and DOCX files.accept=".xls,.xlsx": Accepts XLS and XLSX files.accept=".txt": Accepts text files.
Choosing Question types
The 'text' type, which accepts strings, can substitute for multiple types: date, email, password, etc.. However, you should always use the most appropriate type so user input is validated before it reaches your collection server, curtailing spam.
It is imperative to use the 'password' type where appropriate so that asterisks are displayed in lieu of actual passwords.
Buttons
There are three types of buttons in HTML:
<button type="submit">Submit</button>
<button type="reset">Reset</button>
<button type="button">Click Me</button>
The 'submit' type triggers the submission of the form to the URL specified in <form action= 'submission URL'>.
The 'reset' type clears all user input.
The 'button' type does nothing on its own. It is nevertheless the most versatile type once ombined with JavaScript.
Practice
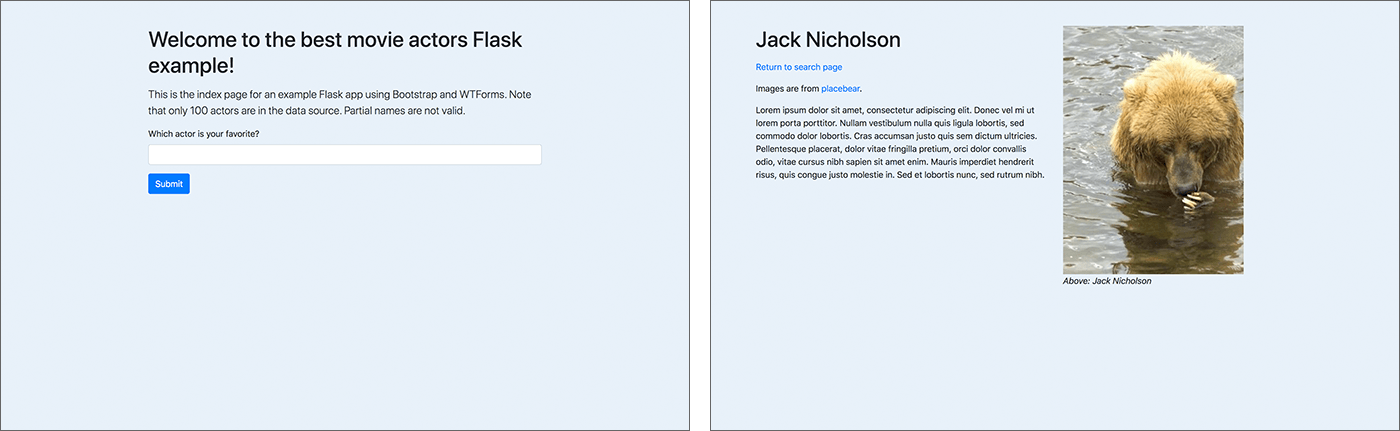
At this point you have learned the basics for HTML. To consolidate your knowledge, build a signup page in HTML.
Below is a rendered example:
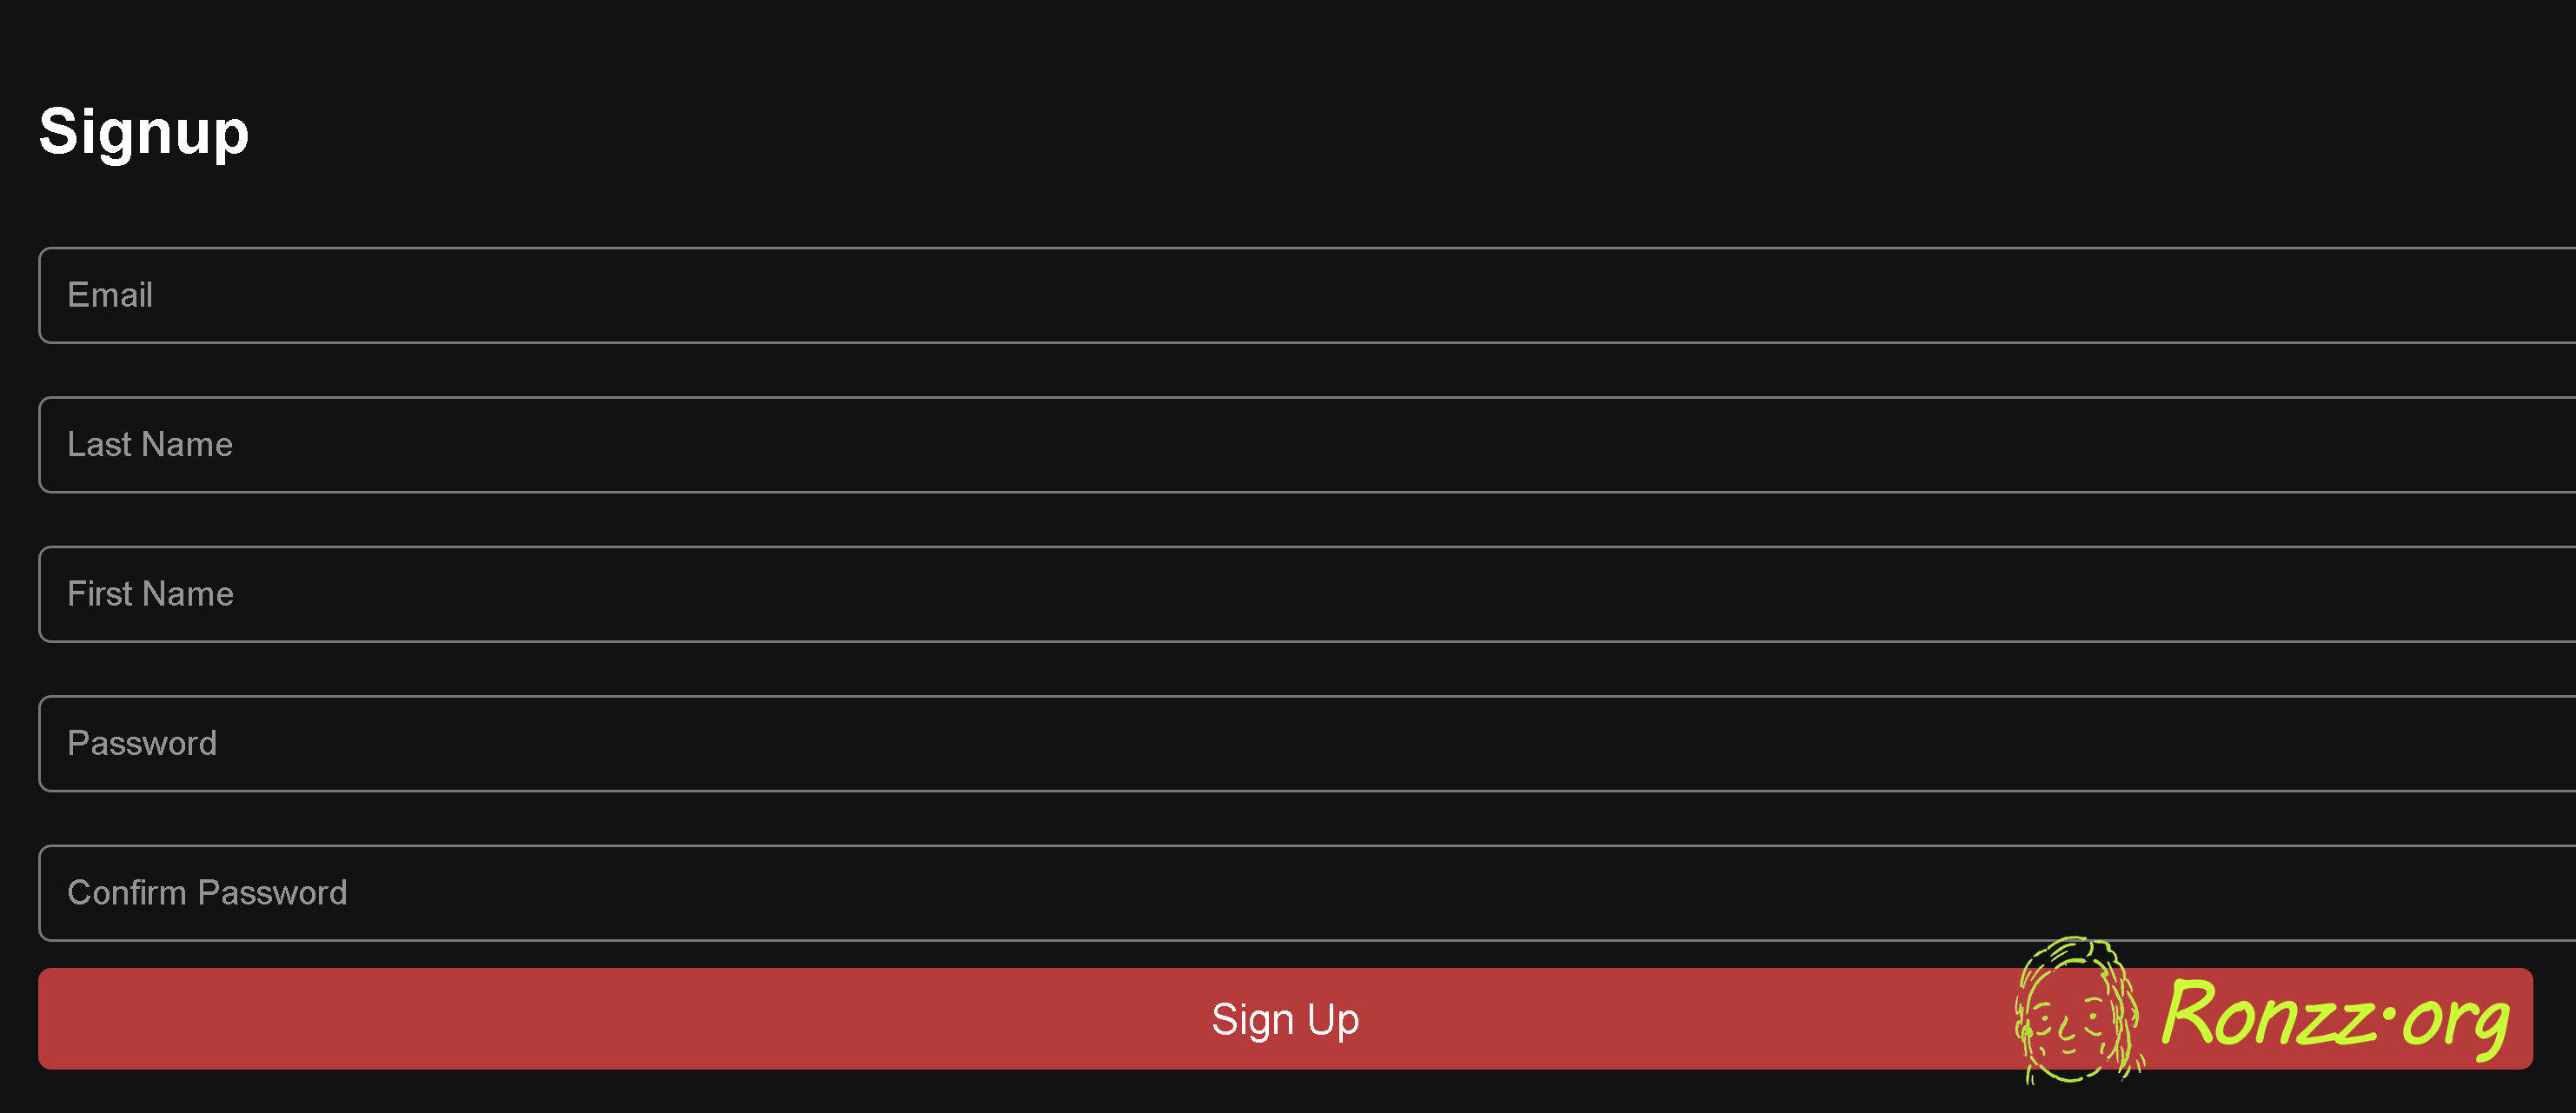
When you are done, compare your result with the example. Which one looks nicer?
Compare the source codes. Why?
(Scroll down for the answer)
It's time to learn CSS.
